


How to add a REP AI Virtual Try-On button to your product pages
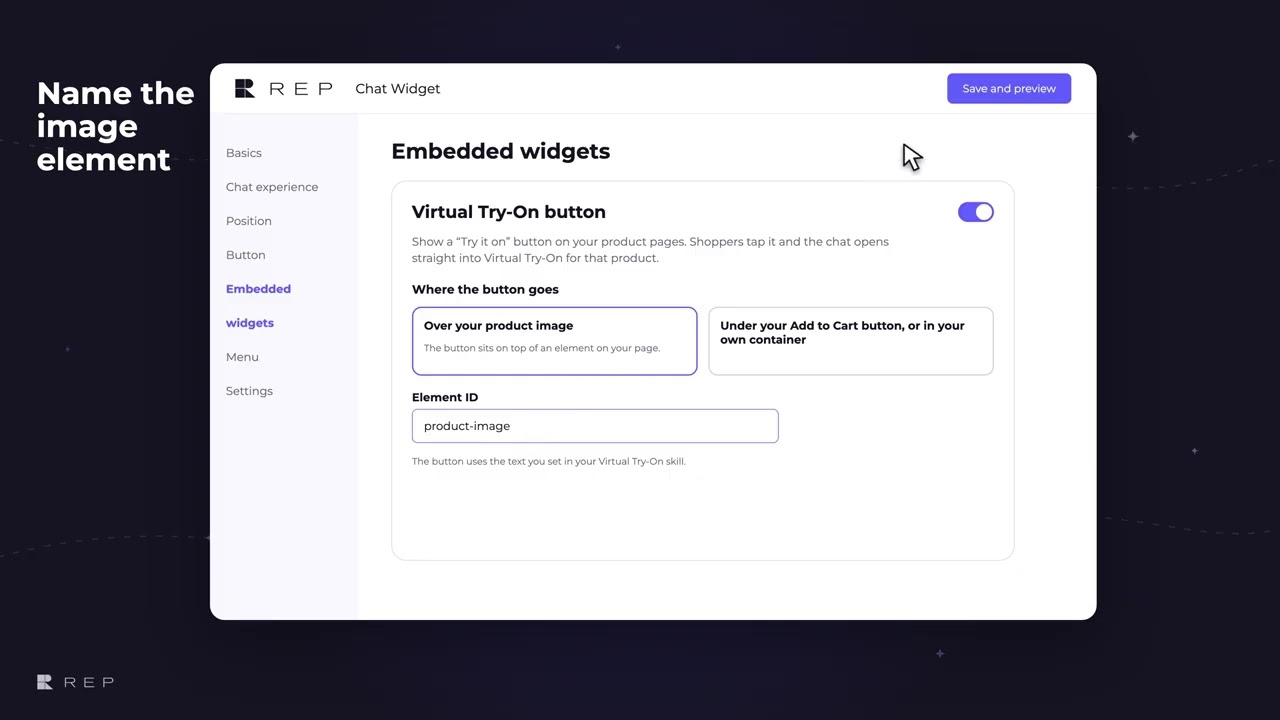
REP AI can show a Try it on button on your product pages that opens the chat straight into Virtual Try-On for the product the shopper is viewing. Turn it on in Chat Widget > Embedded widgets > Virtual Try-On button, then place it over the product image by element ID or under Add to Cart in your own container; it needs the Virtual Try-On skill.
Chapters
Transcript
Try-On button and its switch
The button can sit right over a product image, where shoppers can see it while they browse. In chat widget settings, this has its own switch, so it does not depend on the inline PDP widget. Choose the image placement and enter the ID of the image element on the product page.
Choose where it goes
A supported alternative places the button inside a named container, such as a block beneath Add to Cart. On the store, the shopper taps the label already configured in the Virtual Try-On skill.
Shopper taps Try it on
That opens chat and starts try-on for the product they are viewing.
Common questions
Can REP AI add a virtual try-on button to my product pages?
Yes. Turn on the Virtual Try-On button in Chat Widget > Embedded widgets; shoppers tap it and the chat opens straight into Virtual Try-On for that product.
Do I need the inline PDP widget for the Try-On button?
No. The Virtual Try-On button has its own switch in Chat Widget settings, so it doesn't depend on the inline PDP widget.
Where can the Try-On button go on the page?
Over your product image, using the ID of the image element, or under your Add to Cart button or in your own container. It needs the Virtual Try-On skill and a placement set up for your theme.
See it working on your own store.

